
Let’s be honest, sometimes, coming up with cool visuals feels like trying to explain a meme to your grandma. That’s where the Canva AI art generator comes in. With just a few words, you can turn your wildest ideas into eye-catching images, no design degree required. Whether you’re making social media posts, blog banners, or just want to impress your friends, this tool is a total game-changer.
You don’t need to be a pro, and you don’t need to waste hours searching for stock photos. Just type your idea, pick a style, and boom, your masterpiece is ready. It’s like having a magic wand for creativity, minus the awkward wizard robes. So, if you’re tired of staring at blank screens and want to create something awesome in seconds, the Canva AI art generator is your new best friend.
What is the Canva AI Art Generator?

The Canva AI art generator is an online tool that uses artificial intelligence to turn your text descriptions into custom artwork. It’s part of Canva’s AI suite, which includes Magic Media (for text-to-image generation) and Dream Lab (for advanced painting and style blending). With the Canva AI art generator, you can create original images from scratch or tweak existing ones by simply typing what you want. Canva’s AI tools are designed to help you move from imagination to creation in seconds, making the whole process faster and more accessible than ever before.
Key Features of Canva AI Art Generator
- Magic Media & Text-to-Image: Magic Media is Canva’s main text-to-image tool. You type a prompt describing your vision, pick an art style (like watercolor, filmic, neon, or retrowave), and the Canva AI art generator instantly creates visuals for you. You can choose the size and aspect ratio, and each generation gives you multiple options to pick from. If you want to refine your image, use Magic Edit to swap out objects or backgrounds with just a few words. This is perfect for social media creatives and marketing assets where you need fast iterations and unique visuals.
- Dream Lab / AI Painter: Dream Lab is Canva’s next-gen AI painter, letting you generate images with advanced styles and textures. You can create anything from realistic portraits to anime-inspired illustrations, all by describing your vision. Dream Lab also lets you use reference images to guide the AI, so your outputs match your brand’s look and feel. The tool supports various presets, including cinematic, creative, bokeh, and illustration styles, giving you tons of creative freedom.
- Vector AI & Export Options: The Canva AI art generator lets you export your images in multiple formats, including JPG, PNG, PDF, and even SVG for scalable graphics. This is great for logos, branding, and print projects where high-quality, scalable images are essential.
- Integration with Canva Editor & Templates: AI-generated images slot seamlessly into Canva’s editor and templates. You can drag and drop your AI art into any design, use it in mockups, or combine it with other graphics and text. This makes it easy to create cohesive, professional-looking visuals for social media, presentations, and more.
Benefits: Why use the Canva AI Art Generator?
The Canva AI art generator is a powerful tool for anyone who wants to speed up their creative workflow. Here’s why you should give it a try:
- Faster prototyping: Turn ideas into visuals in seconds, not hours.
- Unique assets: Create one-of-a-kind images that stand out from generic stock photos.
- On-brand variations: Use your brand’s colors, fonts, and style to keep everything consistent.
- Scaling content production: Generate multiple images for social media, ads, and blogs in minutes.
- Low learning curve: No design experience needed, just type a prompt and let the AI do the rest.
How to Use Canva AI Art Generator: Step-by-Step (Beginner Friendly)
Ready to create stunning visuals with just a few clicks? The Canva AI art generator makes it super easy for anyone to turn ideas into professional artwork, even if you’ve never designed anything before. Just follow these simple steps to get started.
Step 1: Open Canva and Start a New Design or Use a Template
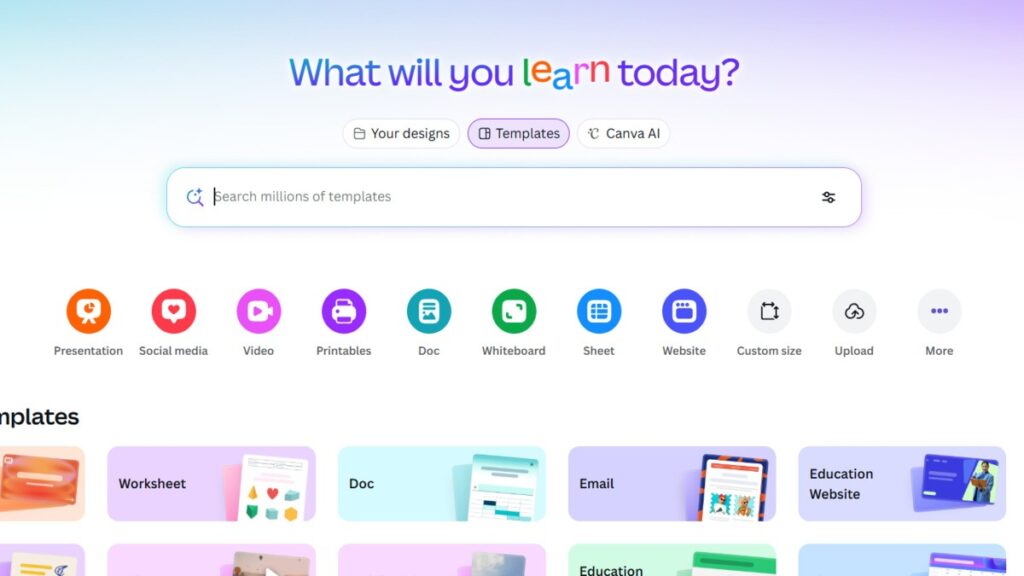
Start by logging into your Canva account. If you’re new, sign up for free. Once you’re in, click on “Create a design” and either choose a blank canvas or pick a template that fits your project, like a social media post, presentation, or blog header. Templates help you get started quickly and make your workflow smoother.
Step 2: Go to the Apps Section and Select Magic Media or Dream Lab
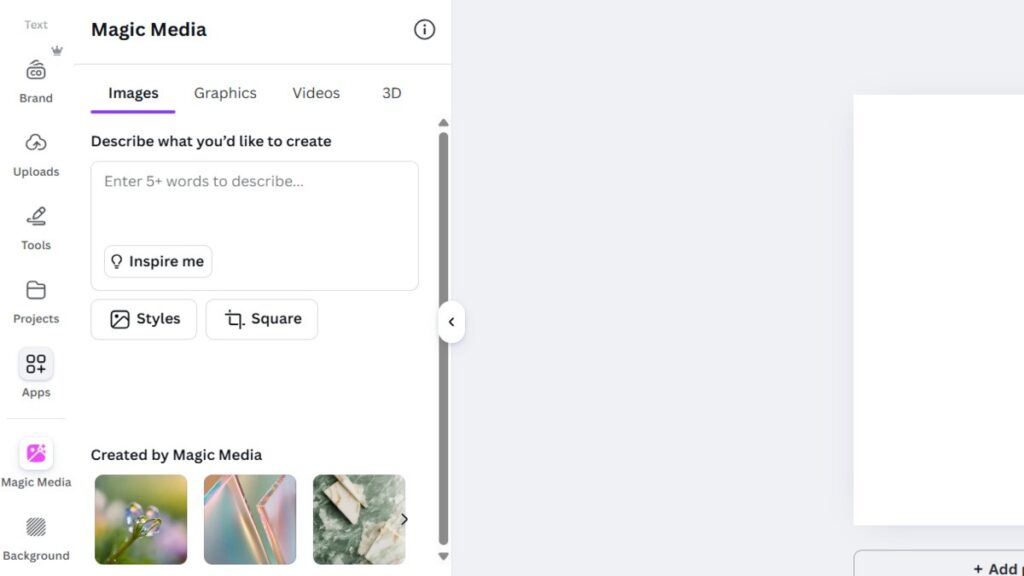
After opening your design, look for the “Apps” section on the left-hand toolbar. Click on it and search for “Magic Media” or “Dream Lab.” Magic Media is perfect for quick text-to-image generation, while Dream Lab offers advanced painting and style options. Select the tool that matches your creative needs.
Step 3: Enter Your Prompt, Describing What You Want to See
In the Magic Media or Dream Lab window, type a detailed description of the image you want. For example, “a cozy coffee shop with warm lighting, watercolor style” or “a futuristic city at night, cinematic style.” The more specific your prompt, the better the results. You can also reference existing images if you want the AI to follow a particular look.
Step 4: Choose Your Preferred Art Style and Size
After entering your prompt, select your desired art style, such as watercolor, filmic, neon, or retrowave. You can also pick the size and aspect ratio that best fit your project. Canva offers multiple options, so choose the one that matches your template or design needs.
Step 5: Click “Generate” and Wait for Your Images to Appear
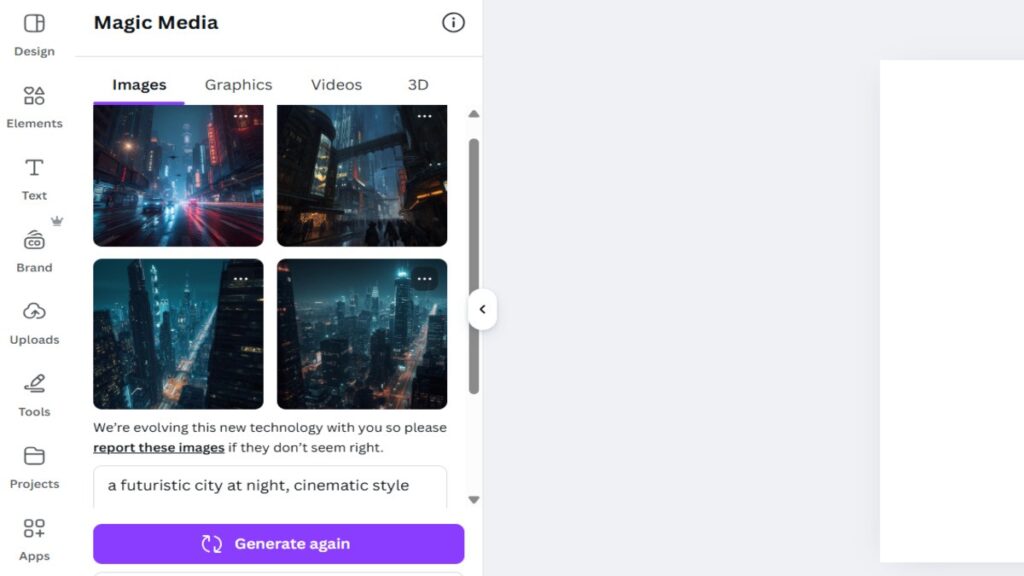
Click the “Generate” button and wait a few seconds. The Canva AI art generator will create several variations of your image. You can scroll through the options and pick the one you like best. If none are perfect, you can generate more or tweak your prompt for a new batch.
Step 6: Refine Your Image with Magic Edit or Other Tools If Needed
Once you’ve chosen your image, you can refine it using Magic Edit. Select the part of the image you want to change (like swapping out a background or object), describe what you want to add or replace, and click “Generate.” This lets you customize your AI-generated image even further. You can also use other Canva tools to add text, effects, or filters for a polished look.
Step 7: Place Your AI-Generated Image in Your Design and Make Final Adjustments
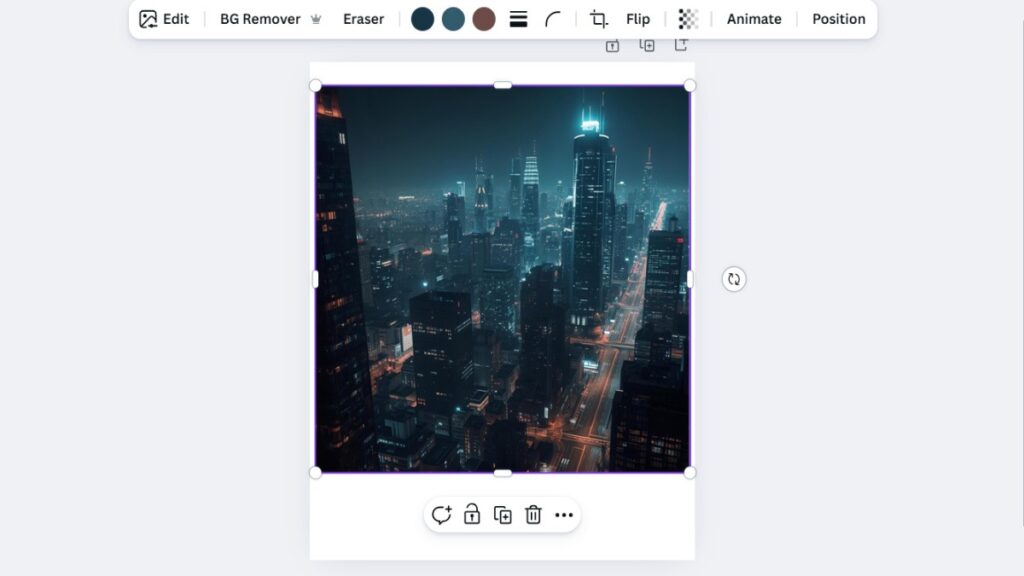
Drag your AI-generated image into your Canva design. You can resize, crop, or layer it with other graphics and text. Use Canva’s editing tools to adjust colors, add borders, or apply effects. Once you’re happy with the result, you can download your design or share it directly on social media.
That’s it! With these simple steps, you can create unique, eye-catching visuals using the Canva AI art generator with no design experience needed. Give it a try and watch your creative ideas come to life in minutes.
Canva AI Pricing Plans
| Plan | Best For | Annual Price (USD) | Key AI Features & Credits |
| Free Plan | Individuals & casual use | $0 | Limited monthly AI access (e.g., ~50 Magic Write uses, limited AI image generations) |
| Pro Plan | Solo entrepreneurs & freelancers | $120 per person | Unlimited premium assets, 1TB storage, ~500 AI uses/month, Magic Media & Dream Lab access |
| Teams Plan | Small businesses & teams | $100 per person (min 3 people) | Everything in Pro, plus team collaboration, 150 credits/month per person for AI image generation, 500 credits/month for Dream Lab |
Looking for in-depth details about canva subcription cost and all, check out our article and read and understand more about it.
Tips to Get Better Results
Want your Canva AI art generator images to look exactly how you imagined? The secret is in your prompts. To get the best results, always be specific and detailed, describe your main subject clearly, like “a golden retriever puppy playing in a sunlit park,” and add context, such as “wearing a red collar, running through autumn leaves, joyful mood.” Use style tags like “watercolor,” “oil painting,” or “cinematic,” and reference famous artists or aesthetics, such as “in the style of Van Gogh” or “retrowave neon lighting.”
Set the scene with lighting, camera angle, and mood. Mention “soft dusk lighting,” “DSLR depth of field,” or “warm, cozy atmosphere,” and use mood words like “peaceful,” “energetic,” or “mysterious.” Optimize your keywords for precision, using “vibrant blue sky,” “smooth marble texture,” or “urban cityscape,” and include framing cues like “close-up,” “wide-angle,” or “from above.” If the first result isn’t perfect, tweak your prompt and try again.
Combine elements, like “a futuristic city at night, neon lights, cinematic wide shot, cyberpunk style.” Mix AI-generated images with your own uploads, layering them for a polished, unique look. With these prompt engineering tips, you’ll unlock the full potential of the Canva AI art generator, letting your ideas come to life with stunning clarity and creativity.
Conclusion
The Canva AI art generator is a total game-changer for anyone who wants to create eye-catching visuals fast. No more hours wasted searching for stock photos or struggling with design tools. Just type a prompt, pick a style, and watch your ideas come to life in seconds. Whether you’re making social media posts, blog banners, or ad graphics, this tool gives you the freedom to experiment, iterate, and unleash your creativity without limits.
Sure, it’s not perfect (sometimes your AI-generated dog might have six legs), but with a little tweaking and some fun prompts, you can get results that are uniquely yours. So, if you’re ready to boost your content, save time, and add a splash of originality to your projects, the Canva AI art generator is your new best friend. Go ahead, give it a try. Your next masterpiece is just a few clicks away.
Looking for Something else? Check out our recent articles; you’ll love them:
