

Building a website no longer needs to feel overwhelming or technical. Modern tools allow individuals and businesses to design, customize, and publish polished websites without worrying about coding, hosting, or server management. The adobe website builder takes this approach further by emphasizing visual design, clear structure, and ease of use. Instead of starting from a blank setup, users work within a guided environment that promotes clarity, creativity, and efficiency. Unlike platforms that act only as an online webpage creator, Adobe combines professional design principles with a structured website-building platform workflow. This guide walks you through building a website step by step, from planning and design to customization and publishing, helping you create a professional, consistent, and functional website.
What You’ll Learn in This Step-by-Step Guide
This guide walks you through the complete process of building a website using Adobe Website Builder, from defining your goals and structure to designing, publishing, and maintaining a professional, fully responsive website with confidence and clarity.
Step 1: Define Your Website’s Purpose and Content Structure
Every successful website starts with a clear purpose. Before opening the adobe website builder, it is important to understand what your website should achieve and how visitors should interact with it. Some websites focus on generating leads, while others aim to inform, showcase creative work, or support a brand’s credibility. Defining this purpose early helps shape content decisions and prevents unnecessary pages or features. Once your goal is clear, you can map out the structure of your website by deciding which pages are essential and how they connect. This planning stage influences navigation, layout, and messaging consistency. When structure is defined early, design decisions feel intentional rather than rushed. A clear plan also saves time later by reducing revisions and redesigns caused by unclear direction or misplaced content.
Key elements to plan at this stage:
- Target audience and user intent
- Primary goal of the website
- Core pages such as Home, About, Services, and Contact
- Basic navigation flow
- Content tone and messaging style
Step 2: Create a New Website Project
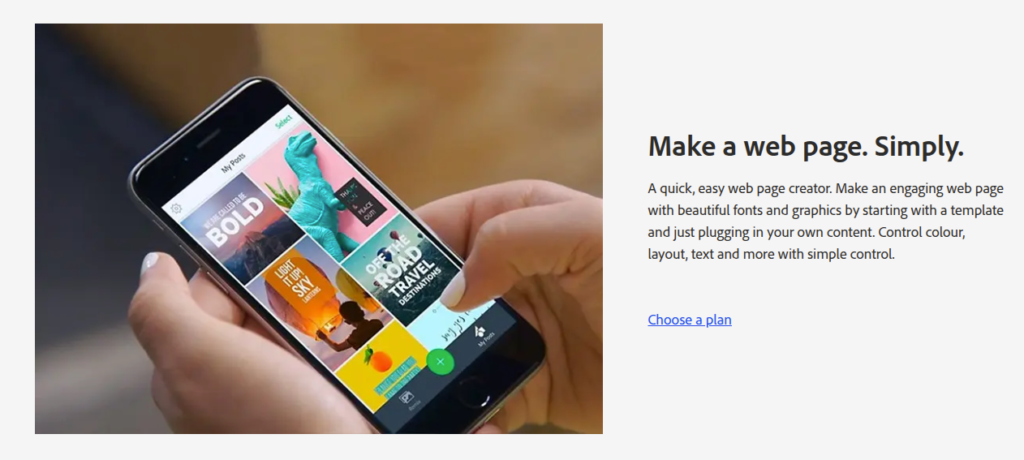
After planning, the next step is creating a new project inside the adobe website builder. Adobe provides a centralized dashboard where all website-related tools are accessible from one place, which helps users stay organized from the beginning. Once you log in, starting a new project opens a visual editor that serves as your main workspace. This environment removes technical distractions and allows you to focus on layout, structure, and content instead of setup tasks. As a website building platform, Adobe simplifies the early stages so users can begin designing immediately. The real-time editing experience helps you understand how changes affect the final output, which builds confidence and encourages experimentation. This step establishes the foundation of your website and prepares you to move smoothly into layout selection and customization.
What happens during this step:
- You log in using your Adobe account
- A new website project is created
- The visual editor becomes your main workspace
- Design and content tools are available immediately
Step 3: Select a Layout or Starting Template
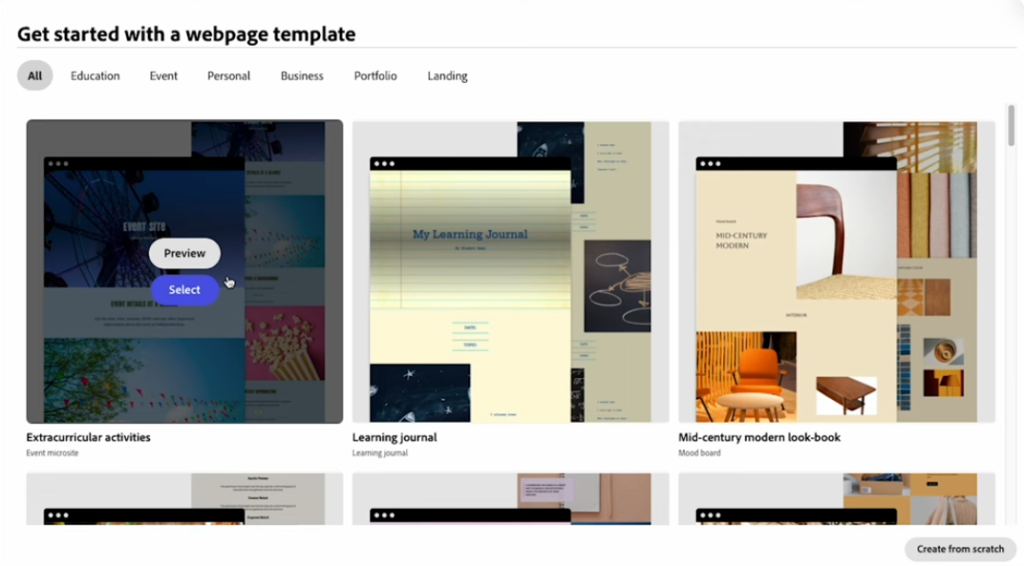
Layouts act as the structural backbone of your website. Within the adobe website builder, users can choose from professionally designed layouts that follow proven design standards. These layouts provide a strong starting point by organizing content into sections that feel balanced and visually clear. Choosing the right layout early helps reduce major changes later and ensures your website supports its intended purpose. A good layout guides visitors naturally, helping them understand your message without confusion or effort. Adobe layouts are flexible, meaning you can adjust sections and content while maintaining a clean structure. This step helps align design with content goals and improves usability across devices.
When selecting a layout, consider:
- The type of website you are building
- The amount of content you plan to publish
- Visual style that reflects your brand
- Page hierarchy and section flow
- Built-in responsiveness
Step 4: Customize the Visual Design
Customization allows your website to feel unique and aligned with your brand identity. The adobe website builder enables users to customize visual elements without writing code, making design changes accessible and intuitive. You can adjust colors, fonts, spacing, and layout positioning while previewing changes in real time. Adobe’s design controls follow professional principles, which helps maintain balance and consistency even for beginners. This step transforms a basic layout into a branded experience that feels polished and intentional. Thoughtful customization improves readability, strengthens brand recognition, and enhances user trust. By focusing on clarity rather than decoration, you create a design that supports content instead of distracting from it.
Design elements to focus on:
- Consistent color palette
- Readable typography
- Proper spacing between sections
- Clear visual hierarchy
- Balanced use of images and text
Step 5: Add Content in a Clear and Structured Way

Content gives your website meaning and purpose. Using the adobe website builder, users add text, images, and media through structured content blocks that adapt automatically to different screen sizes. This approach keeps layouts stable while allowing flexibility in updates. Clear headings help visitors scan information, while concise paragraphs improve readability. Adobe separates content from design, making future edits easier and reducing the risk of layout issues. Well-structured content ensures visitors quickly understand your message and encourages them to explore further. This step focuses on clarity, relevance, and consistency rather than volume, helping your website communicate effectively.
Best practices for content creation:
- Use clear and descriptive headings
- Break text into short, readable sections
- Support content with relevant visuals
- Maintain consistent formatting
- Prioritize clarity over length
Step 6: Build Simple and User-Friendly Navigation
Navigation directly affects how visitors experience your website. Within the adobe website builder, creating navigation menus is simple and intuitive. A clear navigation structure helps users find information quickly and reduces frustration. Adobe automatically updates menus when pages change, which prevents broken links and inconsistencies. Clean navigation also improves accessibility and keeps your website easy to explore. This step focuses on simplicity, ensuring visitors can move through your website without confusion. Well-designed navigation supports usability on both desktop and mobile devices, reinforcing a positive first impression.
Navigation best practices include:
- Limiting menus to essential pages
- Using clear, descriptive labels
- Keeping navigation consistent across pages
- Avoiding overcrowded menus
- Testing navigation on mobile devices
Step 7: Review Mobile Responsiveness
Mobile responsiveness is essential in modern website design. The adobe website builder automatically adjusts layouts for different screen sizes, but reviewing mobile views ensures the best experience. Previewing your website on phones and tablets helps identify spacing, alignment, or readability issues that may not appear on desktop. Adobe’s responsive system reduces manual adjustments, saving time while maintaining quality. This step ensures your website remains usable and visually balanced across all devices. A responsive website improves engagement, accessibility, and overall user satisfaction.
What to review on mobile:
- Text size and readability
- Image scaling and alignment
- Section spacing
- Menu behavior
- Overall visual balance
Step 8: Apply Basic SEO Settings
SEO helps your website become discoverable over time. The adobe website builder includes built-in SEO tools that allow users to edit titles, meta descriptions, and URLs easily. These elements help search engines understand your content and improve visibility. Adobe’s clean structure and optimized performance support SEO best practices without advanced technical work. This step focuses on building a strong foundation rather than complex optimization. Clear structure and relevant descriptions improve both search visibility and user experience.
SEO basics to set up:
- Clear and relevant page titles
- Descriptive meta descriptions
- Clean and readable URLs
- Logical heading structure
- Fast-loading pages
Step 9: Preview and Test the Website
Testing ensures your website functions smoothly before launch. The adobe website builder offers preview tools that allow you to review layout, navigation, and content flow. Testing across devices helps identify small issues that could affect user experience. This step improves reliability and ensures your website feels professional from the first interaction. Reviewing content accuracy and visual consistency builds confidence in your final result.
Areas to test before publishing:
- Navigation links
- Layout consistency
- Image loading
- Mobile and desktop views
- Content accuracy
Step 10: Publish and Maintain Your Website
Publishing your website is straightforward with the adobe website builder. Adobe manages hosting, deployment, and performance automatically, removing technical responsibilities. Once published, your website goes live instantly and remains easy to update. This makes Adobe a dependable website creator for business users who value reliability and control. Ongoing maintenance keeps your website relevant and accurate. Regular updates also improve engagement and long-term performance.
After publishing, focus on:
- Updating content regularly
- Adding new pages when needed
- Maintaining design consistency
- Reviewing performance periodically
- Improving pages based on feedback
Why Adobe Website Builder Stands Out
| Feature | Description |
| Design Focus | Adobe places greater emphasis on design control, visual precision, and brand consistency compared to a google website builder. It supports professional presentation and creative flexibility rather than just basic functionality. |
| Benefits | Ideal for users who value design quality and long-term growth over quick setup. |
| Visual Customization | Offers strong options to tailor the look and feel of your website to match your brand. |
| Layouts | Provides clean, professional layouts that are visually balanced and user-friendly. |
| Workflows | Creative-first workflows prioritize design, usability, and intuitive building processes. |
| Hosting & Branding | Integrated hosting and brand-focused tools ensure a consistent, polished, and reliable website experience. |
Conclusion
Building a website becomes far more approachable when the process feels structured, intuitive, and well guided. The adobe website builder supports users at every stage, from early planning and layout selection to publishing and ongoing updates. Its visual editor allows users to design confidently without technical complexity, while responsive layouts ensure websites perform well across devices. Managed hosting and built-in performance features remove common technical barriers, allowing creators to focus on content, design, and user experience. This balance between creative freedom and structural support makes website building feel efficient rather than overwhelming. By combining detailed step-by-step guidance with scannable listicles and clear explanations, this approach helps users make informed decisions throughout the process.
Leave a Reply